Serge van den Oever's weblog
Sitecore demo portal series - Part 1 - create an empty environment from scratch with the demo portal
Thu Sep 15 2022 • ☕️ 7 min read • you like my writing? Buy me a coffee
Nota bene
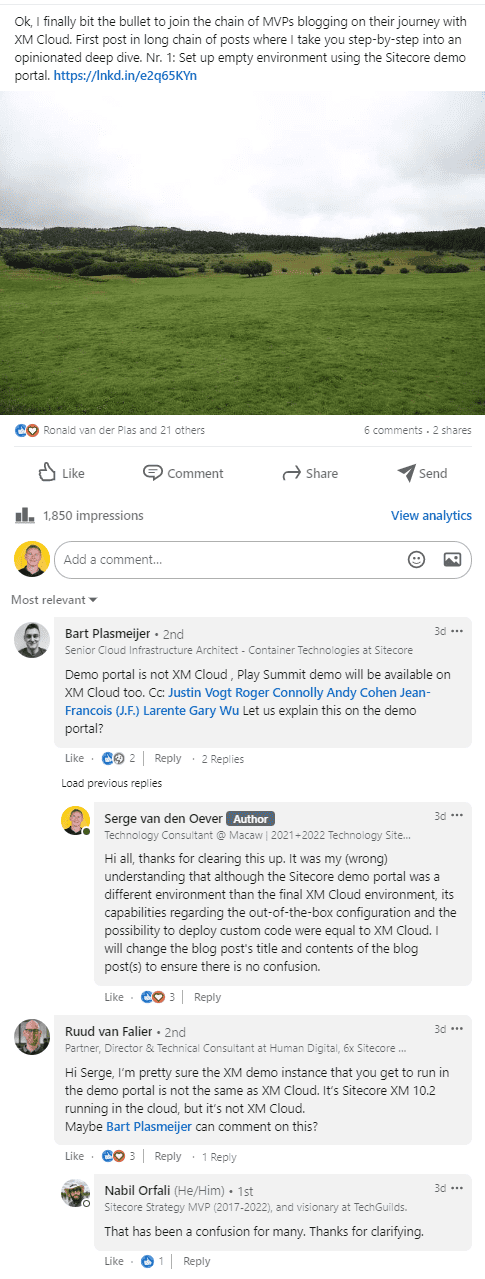
A word in advance: I was under the assumption that after promises by Sitecore that the MVPs would have early access to XM Cloud, that our access to the Sitecore demo portal was our access to XM Cloud. So I wrote a blog post XM Cloud series - Part 1 - create an empty environment from scratch with the demo portal. In conversations on my LinkedIn announcement of this blog post, It became clear this was a big mistake:
That is why I rewrote the original blog post and created a new blog post (this post) containing the original information, but now tailered to the fact that it is about the Sitecore demo portal environment. The sample project creates is named acme-xmcloud, sorry for that, I didn’t want to recreate all the screenshots.
And now on with the original blog post, but now tailored to the fact that it is the Sitecore demo portal.
Introduction
A powerful, cloud based, demo environment is finally at the fingertips of partners and Sitecore MVPs through the access that was provided to us to the Sitecore demo portal. Many blog posts have been written to show the first steps with the demo portal, and how to create a demo site based on the Play! Summit and Play! Shop demo templates:
In this post, I will start with the empty template that consists of a vanilla Sitecore XM 10.2 with some installed packages and Experience Edge. This setup (XM+Edge) will be very similar to what XM Cloud will be in the future.
Selection of this empty template means that manual steps are required to:
- create the Sitecore headless site through the Sitecore Content Editor
- create the “head” website based on Next.js through the Sitecore CLI
These manual steps will be described in additional blog posts in this Sitecore demo portal series.
Note that the Sitecore demo portal is available for quickly getting demos up and running, so this will not be the experience you will get when building a production Sitecore XM or XM Cloud solution for customers. The way of working in the self-service demo portal is very similar to the way that XM Cloud will work.
Getting a vanilla Sitecore XM site up and running
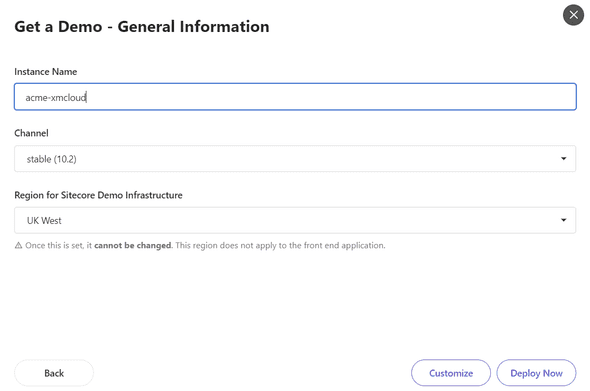
The first step is to select the Product (XM + Edge) template as the demo template. This demo template will Install a valilla Sitecore XM 10.2 for content management (CM), and Experience Edge for content delivery.
Let’s go through the steps:
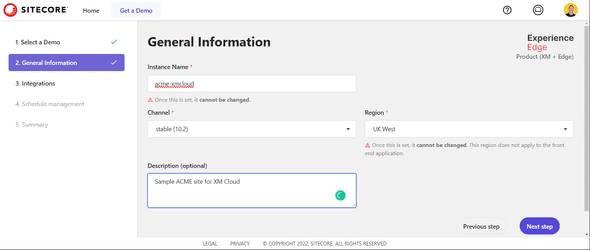
If we press the Customize button, a description can be given to the demo site instance:
As in the other demo templates, we get some possible integrations. For the Product (XM + Edge) template this is only GitHub and Content Hub, while in the other demos there are other integrations available as well like CDP and OrderCloud.
I will use the GitHub integration, but normally in customer projects we use Azure DevOps for managing our Git repositories. Using GitHub is convenient in this case because we will use Vercel for the deployment of the “head” website, and Vercel has a great developer experience (DX) when the source code is hosted on GitHub.
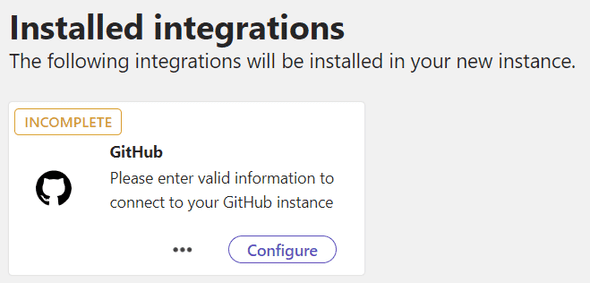
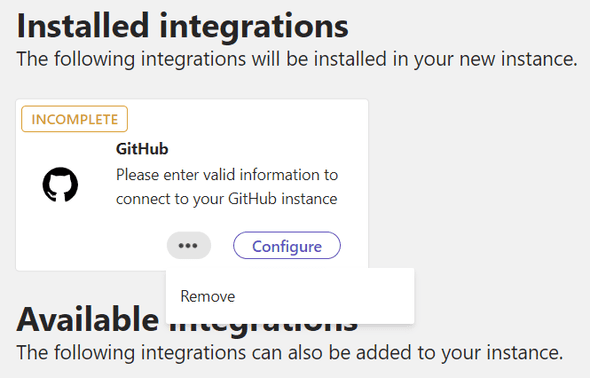
When we select the GitHub integration it shows that the integration is INCOMPLETE:
We need to press the Configure button to establish a connection to GitHub:
Note that a selected integration can be removed by selecting the three dots:
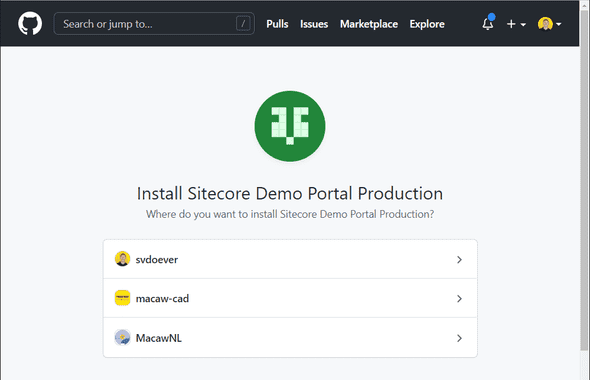
When we press the Add connection button, we are redirected to GitHub to authorize Sitecore to my repositories:
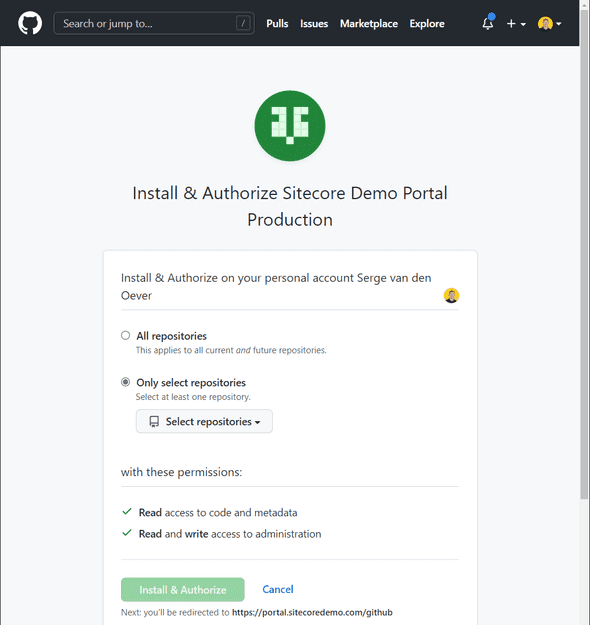
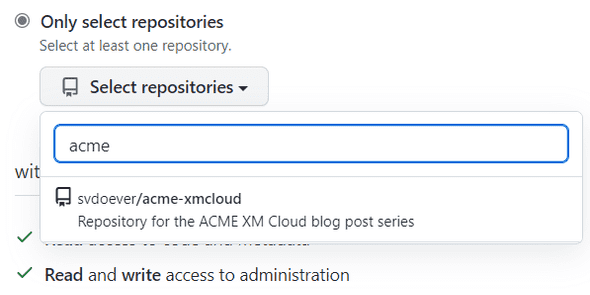
Although Sitecore is my best friend, I prefer to only authorize Sitecore to only selected repositories:
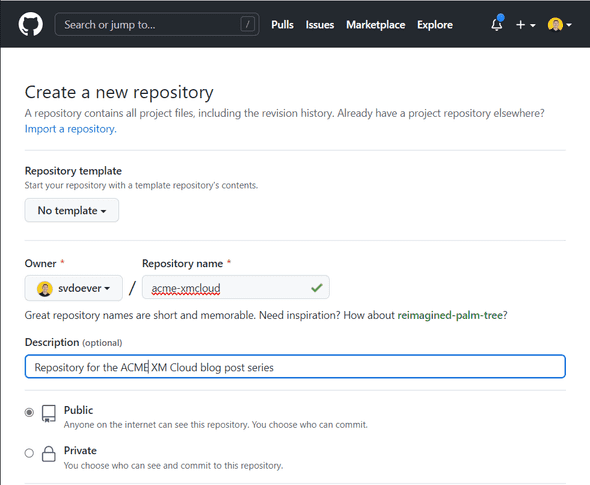
Because I want this project to use a new repository, I head over to GitHub to create a new empty repository for the ACME project to land on:
On returning to the GitHub repository selection screen I’m happy surprised that it directly finds the newly created repository:
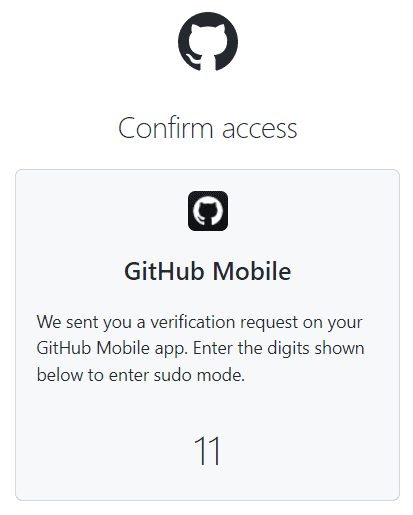
After pressing the Install & Authorize button I get a fancy two-factor authentication screen to open my GitHub mobile app to enter the displayed numbers. Your experience might differ, depending on how you configured your authentication on GitHub:
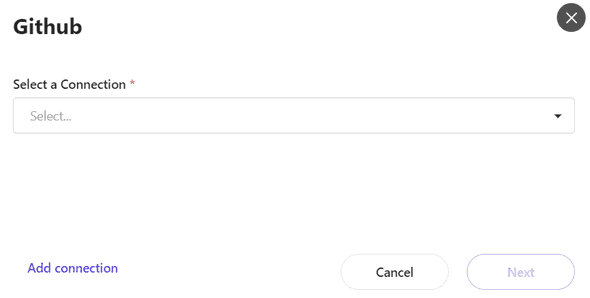
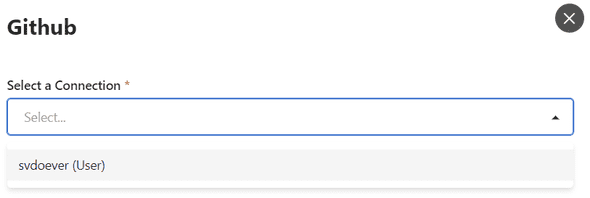
After all these steps we can continue in the Sitecore demo portal to select the GitHub connection, where my account is now visible:
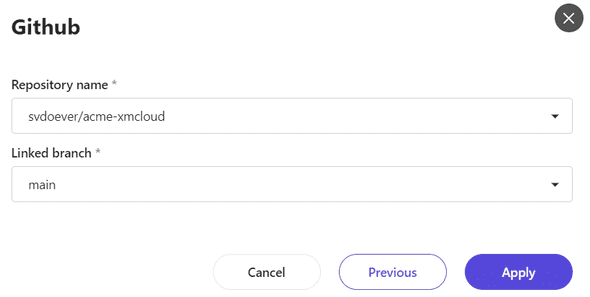
And on pressing the Next button I can select the repository and branch to use:
The GitHub connection is now configured, and we can continue to the next step where a time can be selected that the running instance will automatically shut down:
A handy feature for a demo portal, and this will save Sitecore a lot of money!
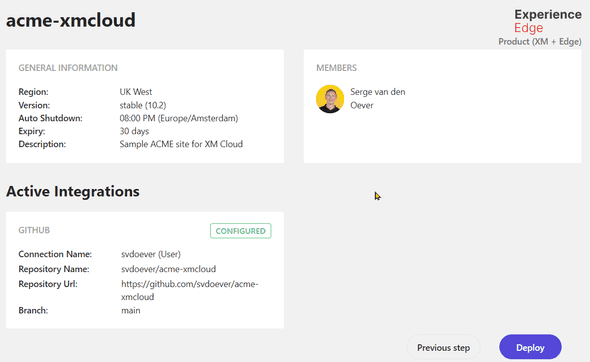
At the last step, a nice overview screen is presented and the deployment can start!
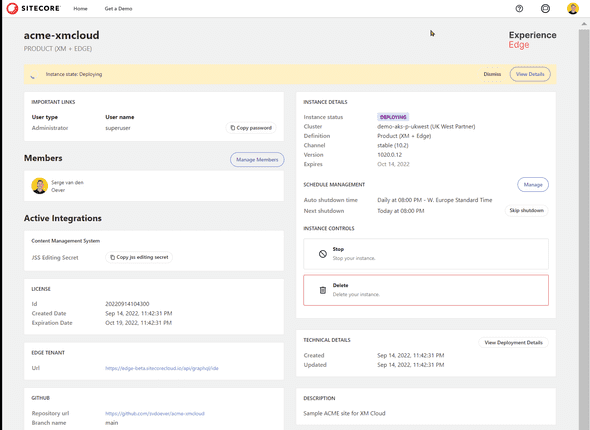
An impressive overview screen is presented to see all configurations and the status of the deployment:
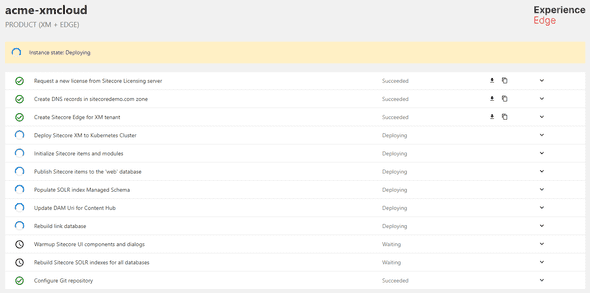
On selection of the View Details button at the top right, a details screen with the executing steps is shown:
Note that every step can be selected for further details:
Most steps have nothing to show, but the Deploy Sitecore XM to Kubernetes Cluster reveals that the Sitecore CLI is used for some of the steps. The following CLI commands are executed:
dotnet sitecore login --client-credentials true --auth https://acme-xmcloud-id.sitecoredemo.com --cm https://acme-xmcloud-cm.sitecoredemo.com --allow-write true --client-id "Demo_Automation" --client-secret "xxxx" -t
dotnet sitecore index schema-populate
dotnet sitecore index schema-populate (yes this step is executed twice)
dotnet sitecore publish
dotnet sitecore index rebuild
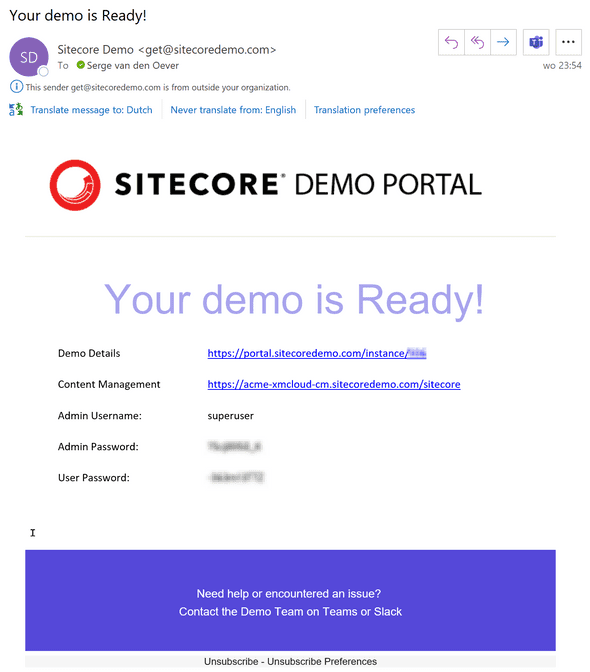
When the deployment is completed a nice email is sent with further information:
So what do we have now
We now have a vanilla Sitecore XM 10.2 Content Management (CM) server in the cloud running on a Kubernetes cluster managed by Sitecore. It almost feels like SaaS!
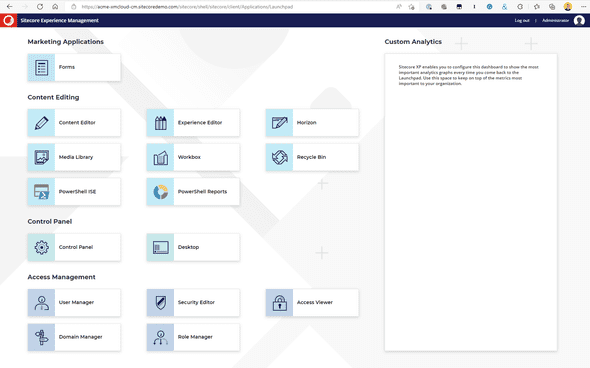
If we log in on the new created Sitecore 10.2 CM environment, we get the well-known 10.2 UI:
It still shows the message that Sitecore XP enables you to configure this dashboard to show the most important analytics graphs every time you come back to the Launchpad. Use this space to keep on top of the metrics most important to your organization. :-)
We can also see that the Horizon editor is available.
Next to this, the following modules are installed:
- SXA Headless
- Headless services
- Experience Edge Connector
We will use these modules in the following blog posts to set up a Sitecore site, and to build the “head” website using Next.js.
Discuss on Twitter • Edit on GitHub
This work is licensed under a Creative Commons Attribution-NonCommercial 4.0 International License. You are free to share and adapt this work for non-commercial purposes, provided you give appropriate credit, provide a link to the license, and indicate if changes were made. To view a copy of this license, visit http://creativecommons.org/licenses/by-nc/4.0/.
Serge van den Oever's weblog

Personal blog by Serge van den Oever - als je maar lol hebt...
X: @svdoever
LinkedIn: Serge van den Oever - articles on LinkedIn
GitHub: svdoever
Technology Consultant @ Macaw
2021-2024 Sitecore Technology MVP
